

Substack Notes Scheduler User Guide
How to get most out of your Notes Scheduler?

Looking for the latest User Guide? Check below

Introduction
Substack Scheduled Notes is a simple Chrome browser extension designed to help content creators and writers like you effortlessly schedule when to post your notes.
How does it work?
Login to your Substack account, go to your own Notes page (https://yourname.substack.com/notes ), and follow four simple steps:
Click the Extension icon
Write your Note (pictures attachments welcome)
Select when to post
Hit Schedule
You can add multiple notes with individual schedules.
NOTE: You must leave your browser tab open on your Notes page. The browser plugin will then post your note(s) at the scheduled time.
Installation
This Chrome extension has the following operating system requirements:
Windows 10/11 or later on laptops and desktop computers
MacOS Sonoma 14.6.1 or later on Macbook laptops or Mac Mini computers
ChromeOS 131.0.6778.241 or later on Chromebook laptops
The Chrome extension has been tested on the following browsers:
Chrome 31.0.6778.265 or later
Brave 1.73.105 Chromium: 131.0.6778.265
Edge (TBD)
Installation Steps
Once you have completed your purchase, click the DOWNLOAD button for Chrome Extension v1.3.1 or the latest version on the page.
1. Download the Zip file and unzip it to a new folder.
2. Open Chrome browser and navigate to chrome://extensions/
3. Enable Developer mode on the right side
4. Click the "Load unpacked" button and select the folder where you unzipped the files.
5. Enable Substack Scheduled Notes extension
6. Pin extension on the browser toolbar - cloudberry icon will be visible
The page contains screenshots of each of these steps. Please follow the steps as shown.
Troubleshooting Installation Issues
Windows, MacOS, and ChromeOS operating systems support the ZIP file format. However, a few Windows users have reported issues downloading and unpacking the ZIP file.
If you get a warning about a missing manifest file, you must verify that you have correctly unzipped the downloaded ZIP file.
Microsoft provides these instructions for unzipping files.
Quick Test
If your installation was successful, you can perform a quick test.
Open your Chrome window and go to your Substack Notes page. Typically, it should be something like https://your_substack_username.substack.com/notes.
Click the Cloudberry icon on the right side of the address bar. A popup window with “Schedule a Note” will appear. See the screenshot below.
You can create a test note in the editor window by typing “Testing Notes Scheduler” and then clicking the “Post” button.

If the following alert window pops up with a “Note posted” message, you have successfully installed the Chrome extension and can start scheduling Notes.

Troubleshooting issues
If you are getting an error when clicking the “Post” button, verify the following:
You are logged in to your Substack account
Your browser tab is open on your Substack Notes page
Your note posting works with the regular Substack Post button. See the screenshot below.

Substack Notes Scheduler Chrome extension uses the same underlying API calls to post notes.
Typically, errors appear when users
Are not logged in to their Substack account
Are not on their correct Substack Notes page
Navigate to some other web address
Close the browser tab
Have disabled Notes on their publication.
You can go to your Substack Settings menu and check “Enable notes tab” / Show your notes in a new tab on your publication website.
User Interface Explained
After installation, you will see the following popup window when you click the Chrome extension “cloudberry” icon.
NOTE: This section covers functionality from the Chrome extension version 1.3.1 and later.
Leave a comment if you have new feature ideas or want to give feedback on this functionality
Starting from the top, you can see a “gear” icon in the top right corner. This will take you to the “Options and Settings” page (explained later).
You can see the current version of the Chrome extension that you installed.
“Choose File” is used to select and open Template files. The “Enter search term” text box and the “Search” button allow you to find notes from templates. See the section “Templates and Search” below.
Next, you have the editor window with a toolbar. The following editing functions are available:
“🗑️” Trash can icon - You can clear the editor window using this function.
“B” Bold text icon - You can change selected text to Bold
“I” Italic text icon - You can change the text chosen to Italic
“🔗” link icon - You can add select text and paste the weblink
Bullet list icon - You can create a bullet list from selected sentences
Tx icon - You can clear the formatting from any pasted text. Select the text and click the Tx icon.
Photo icon - You can attach a photo or image from your disk to the document

Below the editor window, you will find a set of buttons.
Schedule Note—Click this button to select the date and time you want to post your note. The note will appear under the Scheduled Notes section with the selected date and time. It will be posted at the chosen time and moved to the Delivered Notes section.
Save—You can save your note for further editing. It will appear in the Saved Notes section.
Load Last - this button will load the last saved note back to the editor window.
Post - this button will post the content of the editor window immediately.
Fetch - this button will fetch all your notes (up to 2,000) with respective metrics from Substack and appear in the Delivered Notes section.
Editing Notes
Clear the editor using the “🗑️” Trash can icon and write a new note. If you want to edit a Saved Note, scroll down the list and click the “Edit” button of the note you want to bring back to the editor.
You can use the toolbar options explained earlier to edit your notes.
NOTE: You must add one new line before a bullet list. Otherwise, the tool will interpret the preceding paragraph as a bullet item.
Saving Notes
You can save notes that you want to edit and post later. The notes are stored on the hard disk using the Chrome browser's Local Storage capability.
The note will appear in the Saved Notes section with the first line as the title and the creation date/time. Each Saved Note row has the following three buttons:
Load - will bring the note content back to the editor but leave the original to Saved Notes.
Edit - will bring the note content back to the editor and remove it from Saved Notes.
Delete - will delete the note from Saved Notes.

Auto Save Feature
If the window is closed, the currently visible note will be automatically saved. It will also be loaded automatically the next time you open the editor window. This Autosave feature uses a separate Local storage and does not use the “Saved Notes” section.
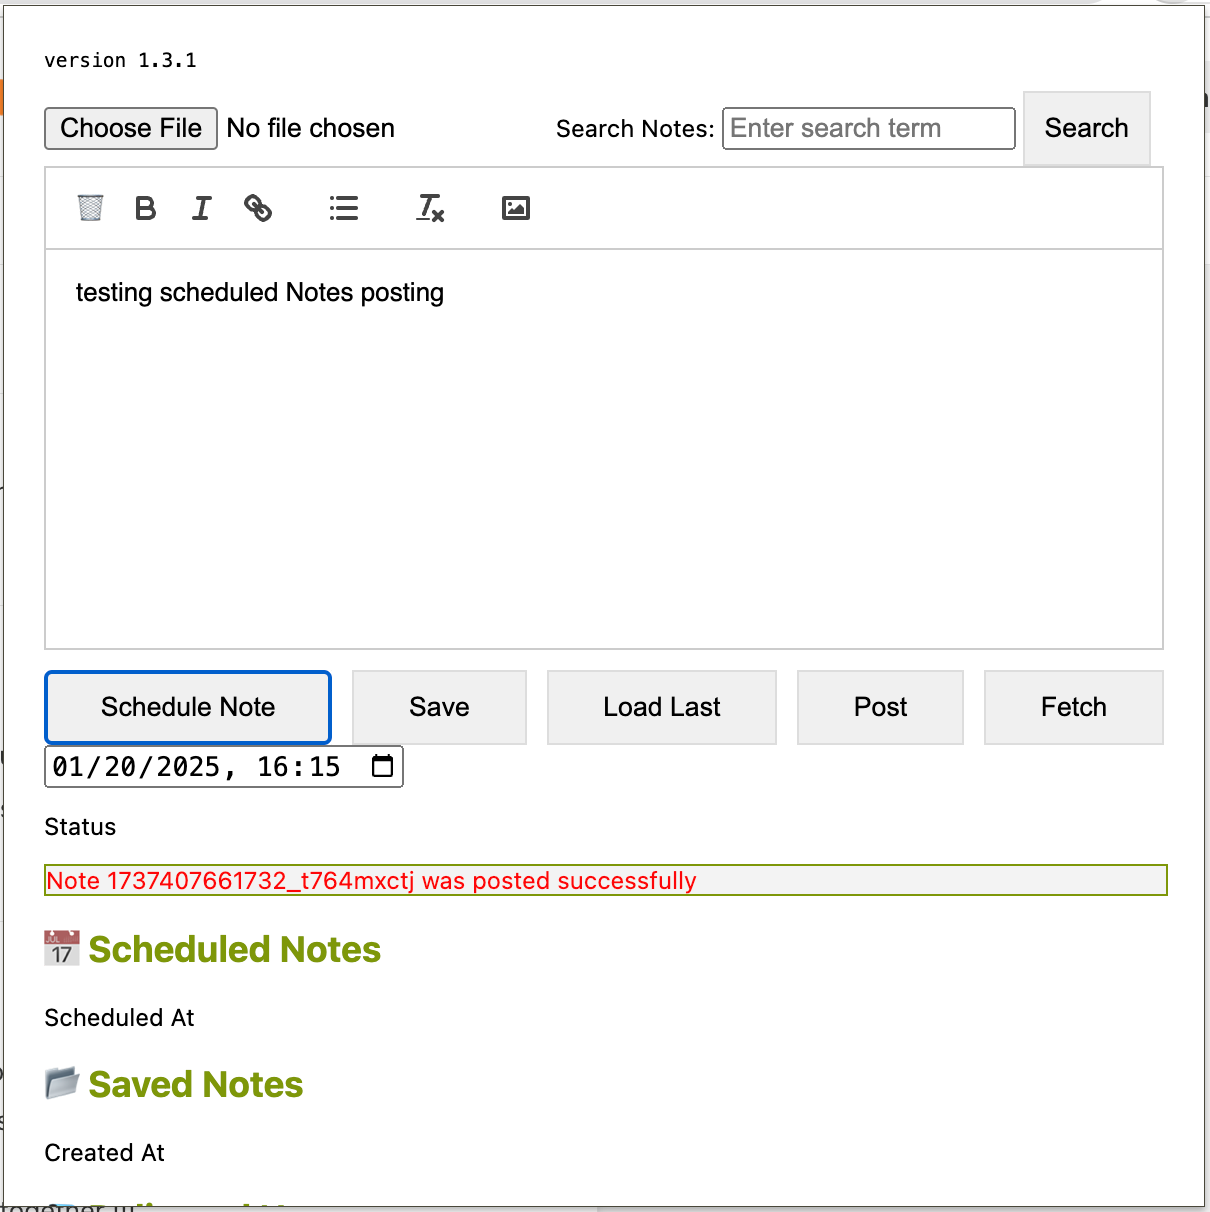
Scheduling Notes
Start by scheduling just one Note in the next few minutes and wait until the posting time. Keep your browser tab open and observe the Status bar above the Scheduled Notes.
The Status bar shows the “Note <note_id> was posted successfully” message at the scheduled time. See the example below. I scheduled this post at 16:13 local time, and it was posted at 16:15.
REMINDER: You must leave your browser tab open on your Notes page. The browser plugin will then post your note(s) at the scheduled time.
This Chrome extension uses your browser's Time Zone settings for the date/time picker.
Once you have successfully scheduled one note and confirmed that the posting happened at the right time, you can go ahead and schedule more notes.
You may want to use the “Save” button to keep a copy of your notes.
NOTE: If you schedule notes multiple days or weeks in advance, remember that the scheduler requires a running computer and an open browser tab. If your computer goes to sleep or you close the Chrome browser, the scheduler won’t work.
Troubleshooting issues
Use the same troubleshooting steps described in the “Quick Test” section.
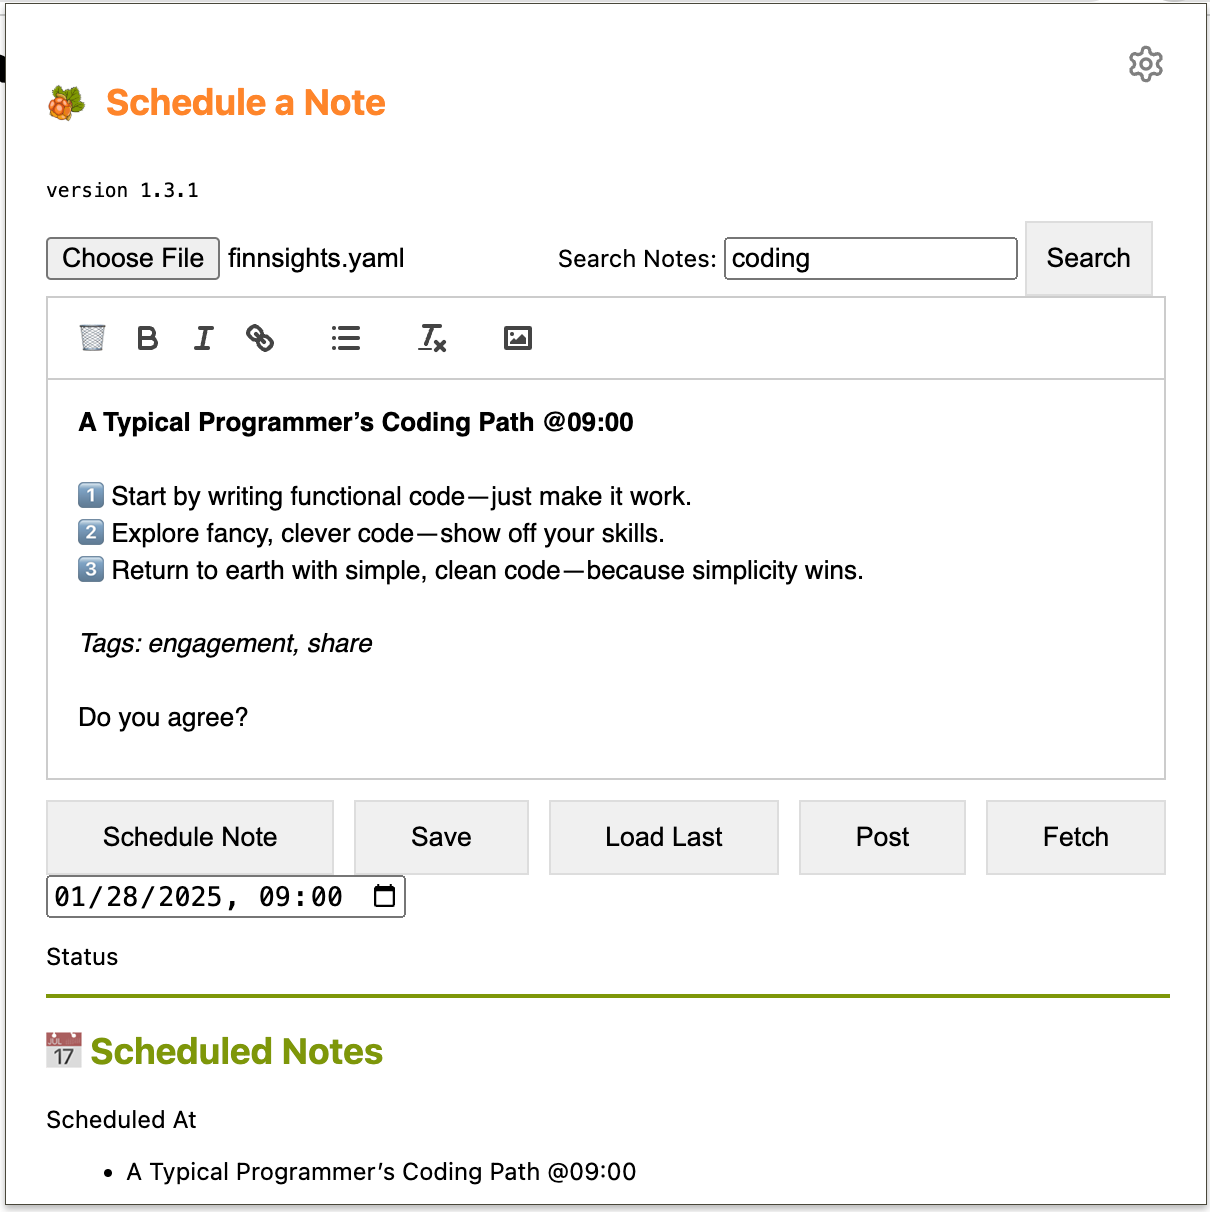
Templates and Search
Above the editor, you can find the “Choose File” and “Search” buttons. These are used for the Template functions.

A template file is just a text file using the YAML format. Templates are helpful when you want to create notes based on themes or topics. You can create a list of notes with a title, date, time, tags, content, and call to action.
You can find example template files in the Templates.zip after you have purchased the product.
YAML files are text files that follow special rules, making them easy for a software program to parse. The structure is shown by indentation with space characters.
For example, a line that starts with “-” is considered a list item. Lines can have keywords such as “title” followed by a colon “:” and the text.
The example below shows a Note list item with specific keywords. The “content: |” is followed by a multiline text block.
- title: A Typical Programmer’s Coding Path
  date: "2024-12-17"
  time: "09:00"
  tags: ["engagement", "share"]
  content: |
      A Typical Programmer’s Coding Path:

      1️⃣ Start by writing functional code—just make it work.

      2️⃣ Explore fancy, clever code—show off your skills.

      3️⃣ Return to earth with simple, clean code—because simplicity wins.

  call_to_action: Do you agree?
While all this sounds a bit “techie,” organizing your reusable templates is a handy feature.
Once you load the template file, you can use the Search button to load relevant notes based on the keyword(s) on the search bar. You can then take the parts you want, edit the note, and schedule it with a single click.
Options & Settings Page
Clicking the “gear” icon in the top right corner will take you to the “Options and Settings” page.
Back to Main - will take you back to the main page.

Configure Google Sheets
Chrome extension version 1.3.1 onwards contains an integration with Google Sheets. The purpose of this integration is to automate
Fetching Notes with metrics into a spreadsheet for performance analytics
Batch scheduling of Notes from a Google sheet
However, this integration requires 12 configuration steps, so it might be a bit complicated if you are unfamiliar with building automated workflows.
Once the configuration is done and the Deployment ID and Sheet Name are configured a new button, “Google Sheet,” will be displayed in the main window.
Detailed instructions for these 12 configuration steps are in this post. The video shows how to use the integrated Google Sheets functionality.
Select Format to Export Notes
You can export your Scheduled, Saved, and Delivered Notes to files on your computer.
Supported file formats are the following:
YAML
CSV
JSON
Markdown
The default value is YAML format, which is recommended for keeping your Notes as backup files.
Import Notes
You can pick which section you want to import from a YAML file. The options are
Saved Notes
Delivered Notes
Scheduled Notes
Choose File button lets you select the YAML file from your hard disk. This could be a previously exported file.
If you choose “Scheduled Notes,” the software will examine the ScheduledAt timestamp in the YAML file and attempt to schedule the posts if it is in the future.
Frequently Asked Questions (FAQ)
You can check the FAQ section on the Gumroad Product page.
Upgrading to a New Software Version
Users who purchased the product through Gumroad will receive email notifications when a new version is available for download.
The “Latest News” section on the Gumroad Product page shows the new features, the release date, and the version number.
You can remove the previous version with the “Remove” button on the chrome://extensions/ page. All notes stored in the Chrome extension local storage will be deleted, so you need to confirm this removal.


NOTE: Before removing this Chrome extension, you should back up your Notes in YAML files. The “Select Format to Export Notes” section provides instructions on how to do that.
You can install a new version of this software by following the installation steps explained in the “Installation” section.
Join the chat to discuss how to use this Notes Scheduler and get tips from other users.

Hi Finn, this sounds like an incredibly useful oiece of programming. Is the extension a one time purchase or a monthly-recurring subscription charge?
Beautiful work, Finn!
Would love a way to schedule a post to multiple days instead of just one by one.